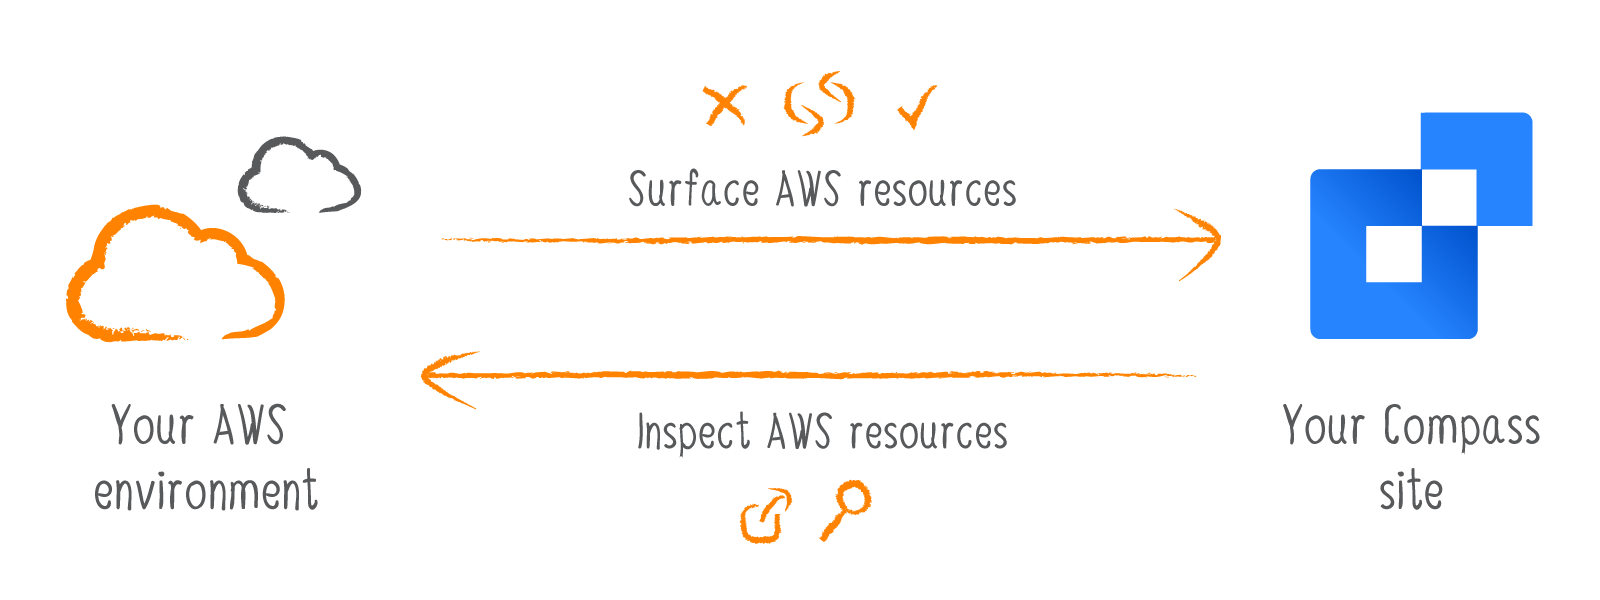
Integrate with AWS allows you to link and track your AWS resources – integrate Amazon Web Services with your DevOps workflows in Compass.
The initial release supports import of AWS resources as Compass components, provides deep links to resources and dashboards in the AWS Management Console, and tracks resource health and compliance.
On this page:
| Table of Contents | ||||
|---|---|---|---|---|
|
Related pages:
What is Integrate with AWS
Integrate with AWS allows you to link and track your Amazon Web Services (AWS) resources right from your DevOps workflows in Compass – currently it allows you to:
Import AWS resources as Compass components
Search AWS backed components via AWS metadata like account, region, and resource type
Follow contextual deep links to AWS resources and dashboards
Inspect AWS resource details and track resource health and compliance
| Info |
|---|
Supported AWS servicesIntegrate with AWS supports most AWS services at the resource level (e.g. for deep links) – refer to Integrations for details on services with dedicated integrations. |
Getting started
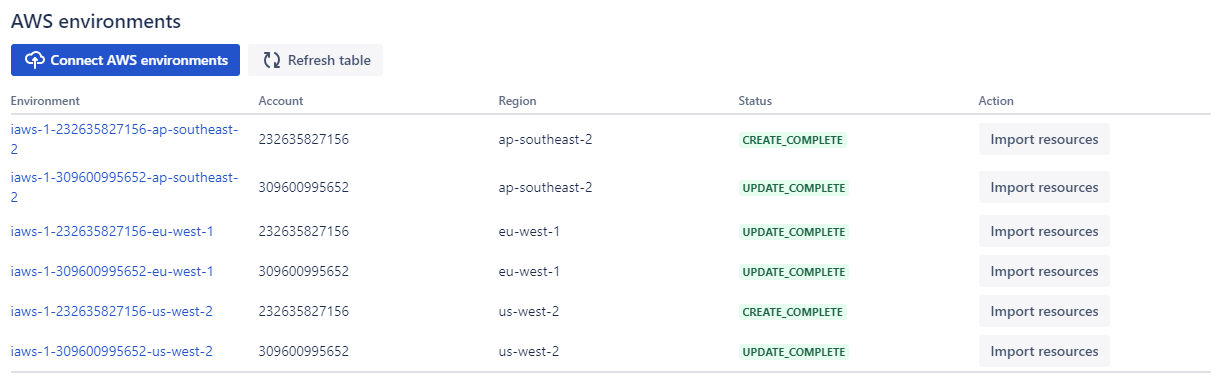
To integrate AWS with Compass, you must first install the Integrate with AWS app in Compass. Then, you connect Compass to one or more AWS environments that contain the resources you want to import and track.
Before you begin
Ensure that you’re an administrator of the AWS accounts you want to connect to, or work with your account owner to configure this app.
Ensure that you’re an administrator on your Compass instance.
| Info |
|---|
You can connect multiple AWS environments (an account/region combination) to a Compass instance. |
Install the app
To integrate AWS with Compass:
Select Apps from the top navigation bar in Compass.
Select Install on the Integrate with AWS app card. This installs the Integrate with AWS app in Compass.

Select Configure on the Integrate with AWS app card.

Authorize the Integrate with AWS app to access Compass on your behalf if you haven't previously done so.
Now you can connect AWS environments and import components from regions within the connected AWS accounts.
Connect AWS environments
You can connect an AWS environment (an account/region combination) via a CloudFormation stack, or you can bulk connect one or more environments via a stack set – update or delete a connection via the CloudFormation console.
| Info |
|---|
It can take 1-2 minutes for the environment to show up in the table. |
Connect single environment
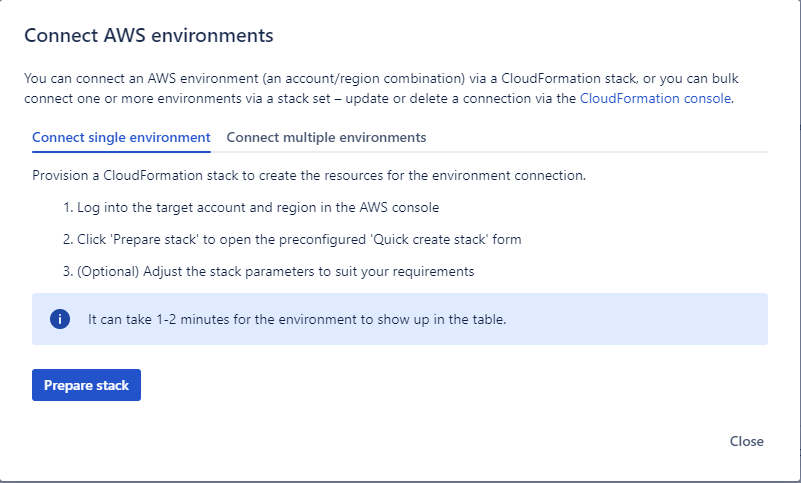
Log into the target account and region in the AWS console
Click 'Prepare stack' to open the preconfigured 'Quick create stack' form
(Optional) Adjust the stack parameters to suit your requirements
Connect multiple environments
| Note |
|---|
Working with CloudFormation StackSets builds upon several more advanced concepts – ensure that your account has all prerequisites for stack set operations before you provision the stack below. |
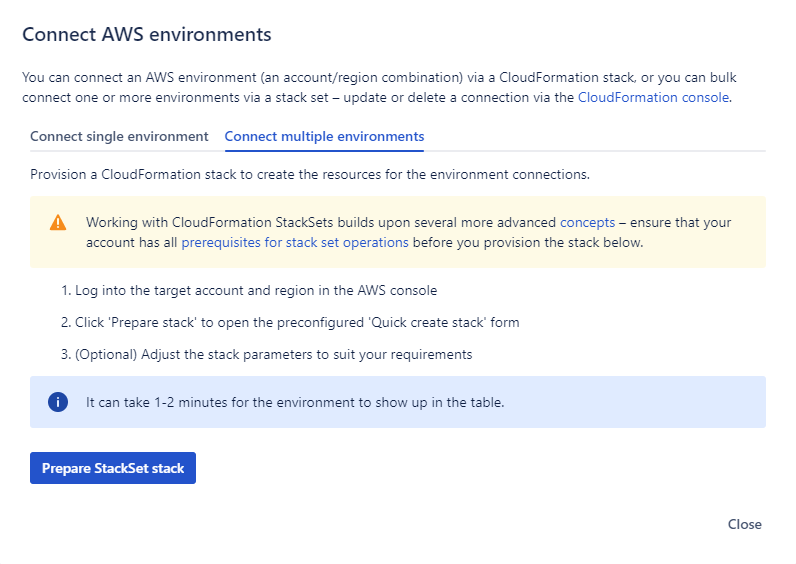
Log into the target account and region in the AWS console
Click 'Prepare stack' to open the preconfigured 'Quick create stack' form
(Optional) Adjust the stack parameters to suit your requirements
How it works – Compass
To work with AWS resources in Compass, you can either import resources as Compass components, or associate a resource with an existing Compass component.
Import AWS resources
You can manually import a single resource via its ARN, or you can bulk import one or more AWS resources via respective 'trigger' tags.
Import a single resource via its ARN
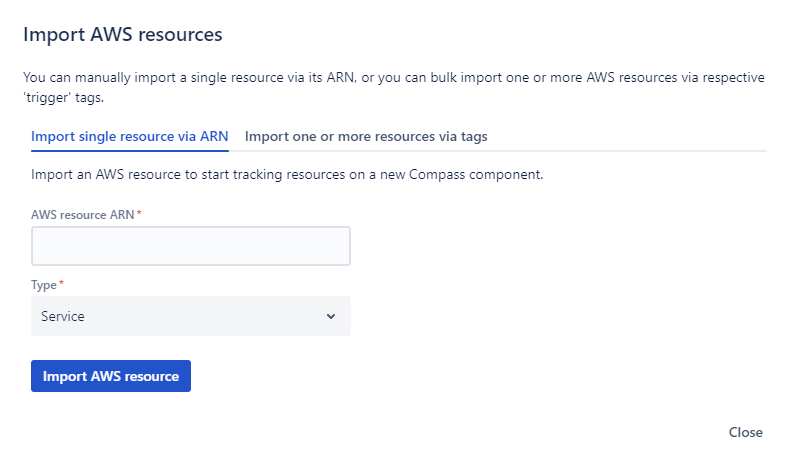
You can manually import a single resource via its ARN.
Paste an AWS resource ARN into the text field
Select the type of the new component
Click ‘Import AWS resource’ to create the component
Import one or more resources via tags
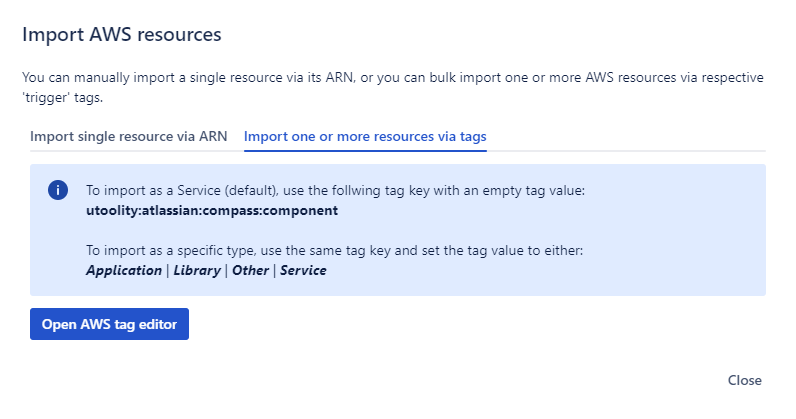
You can bulk import one or more AWS resources via respective 'trigger' tags that you can either apply on the resource itself or via the AWS tag editor.
To import as a Service (default), use the following tag key with an empty tag value:
utoolity:atlassian:compass:componentTo import as a specific type, use the same tag key and set the tag value to either:
Application | Library | Other | Service
Associate AWS resources
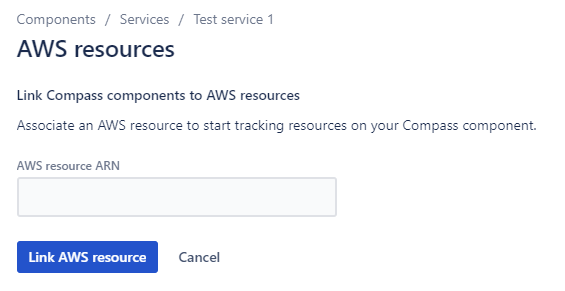
You can associate an AWS resource with an existing Compass component to start tracking resources.
Provide an a resource ARN from the AWS Management Console
Click ‘Link resource’ to complete the association
Unlink AWS resources
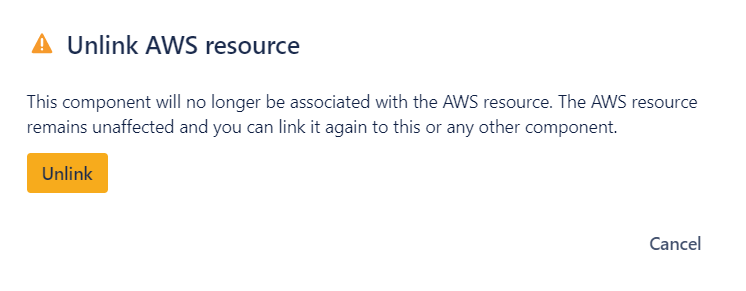
You can also unlink an AWS resource from a component and associate a new one.
Search Compass component catalog via AWS metadata labels
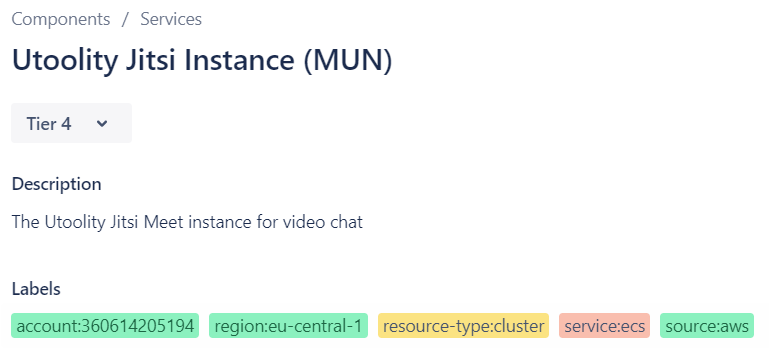
Every component associated with an AWS resource gains metadata labels that simplify navigating the component catalog via the Compass advanced search capabilities.
Currently supported AWS metadata labels are:
Account ID
Region
Service
Resource type
Follow contextual deep links to AWS resources and dashboards
Link rendering usability issue
Links to AWS resources on the component overview page are currently rendered without an icon. This is a technical platform limitation and will be addressed in future Compass releases.
Every component associated with an AWS resource features a deep link to the resource dashboard in the AWS console. Depending on the component type, there will also be supplementary deep links to more advanced contextual dashboards provided by other AWS services like AWS CloudWatch, AWS Config, and AWS Systems Manager Application Manager.
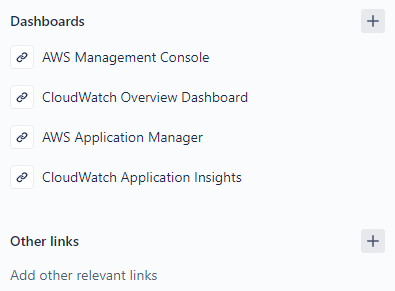
The app currently supports deep links to the following contextual dashboards:
AWS Management Console (most resource types)
AWS Config (supported resource types)
AWS Systems Manager Application Manager (supported resource types)
Amazon CloudWatch automated dashboards for resource groups, for Lambda Insights, and for Application Insights
Inspect AWS resource details and track resource health and compliance
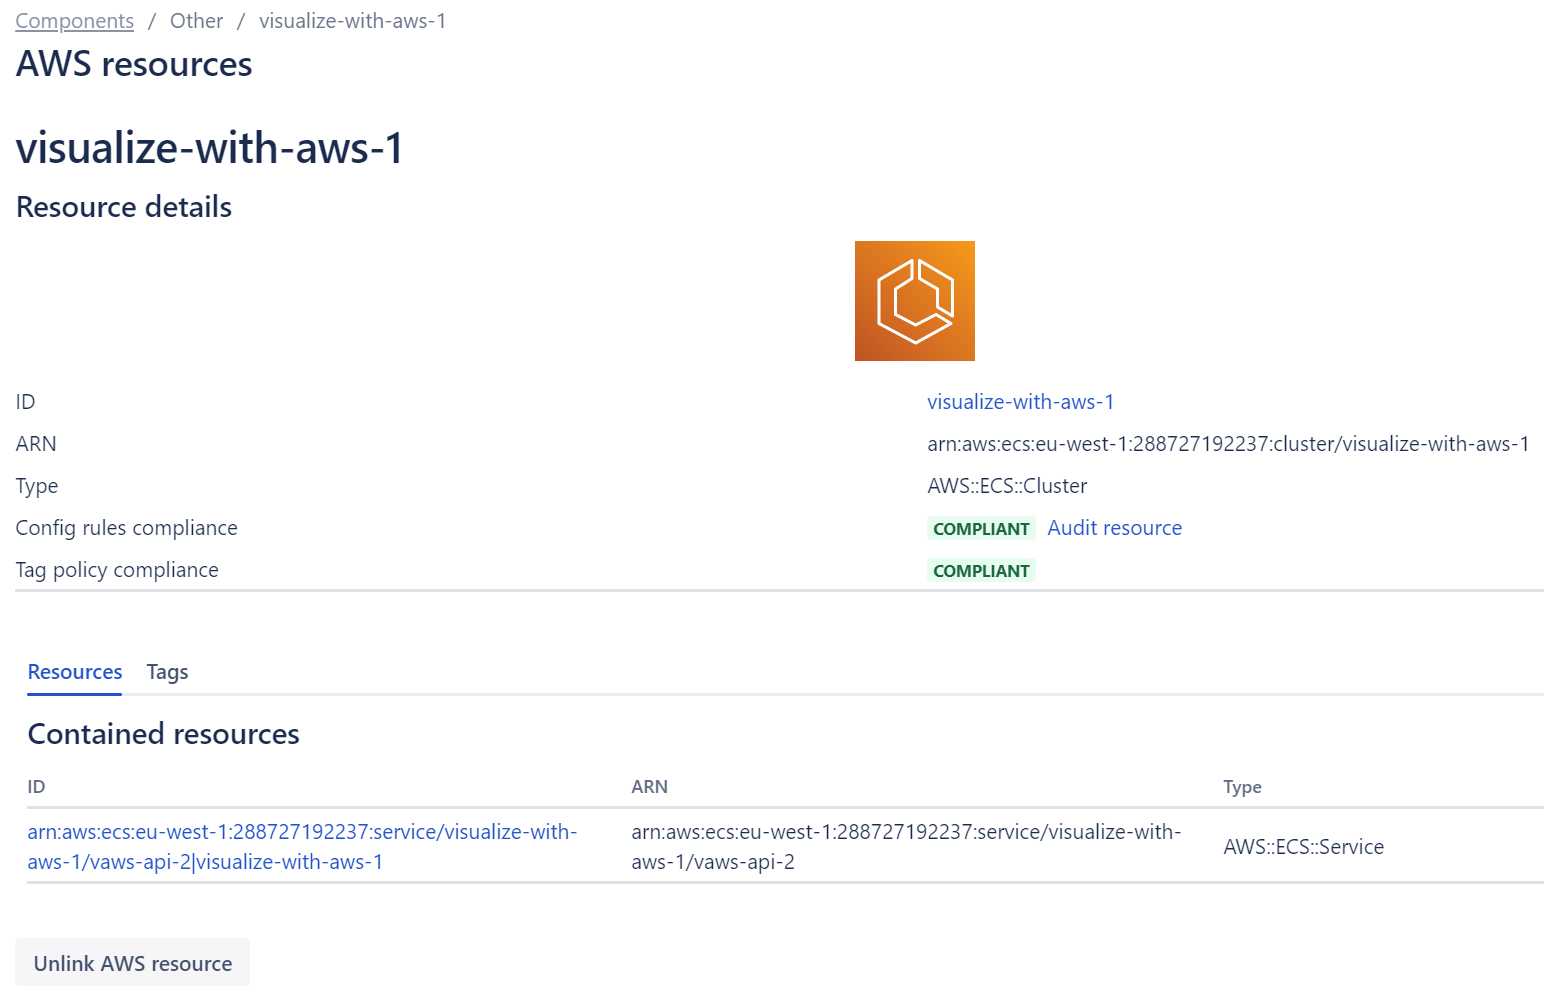
AWS resources page
Every component associated with an AWS resource also features an ‘AWS resources’ page via the Compass sidebar that surfaces more details, applicable health and compliance results , and provides additional deep links depending on the resource type, for example:
AWS Management Console – inspect resource details
AWS Config rules compliance – audit resource configuration and compliance changes
AWS Tag policy compliance – audit resource tags (via resource details link)
Contained resources – navigate to related resources in scope of the current resource